Thursday 30 June 2011

The Official Stuff

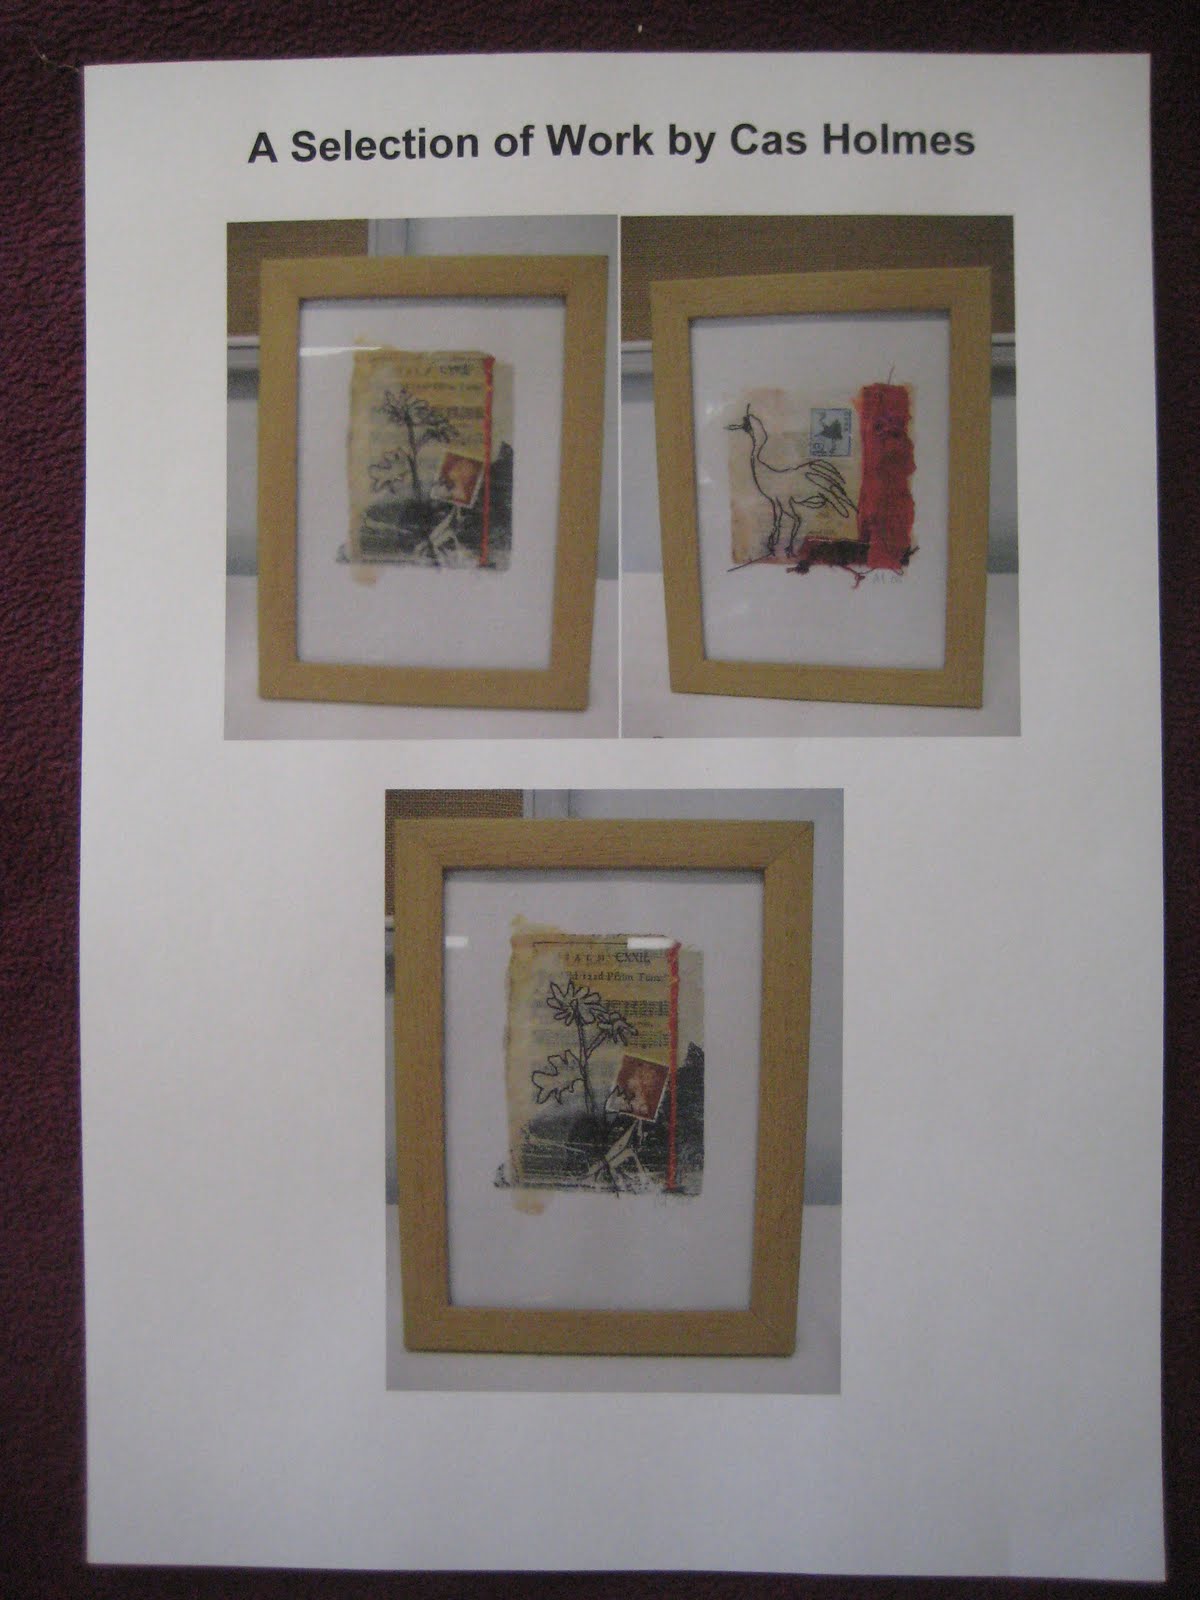
Evaluation of Completed Work


The completed embroidered assessment piece for Module 4 is a Fan based on the design topic of Line and Texture in Media.

How Do You Feel About the Resulting Conclusion?

I do enjoy making textile pieces which can be handled, worn or have a function - if only in a asthetic way! This fan answers the brief in two ways. It encapsulates the language within by "trapping" messages within the fan montures through stitch and paper and can be used as a fan to convey messages out to the prospective suitor. I found the making of the fan fulfilling, I set myself a challenge and I succeeded in conveying the message I hoped to give.

Is It Fit For Purpose - Give Reasons

As a practical item the fan can give a "draft"when moved and can be put in position to convey messages, but this fan has been made to show a method of capturing text and probably will not survive excessive use.

If You Were Asked To Make It Again, What Changes Would You Make To The Way You Designed It And The Way You Made It?

There are so many designs of fan that I might not go with the individual monture style of the Jenny Lind Brise fan, although this was useful to the method of grid stitches and paper pulp capture, and go with a A' l'Anglaise traditional style of an all over piece of fabric attached to the monture spines. If I did this style I would have had to rethink the whole way of capturing the messages as the resulting piece would have to be delicate and flimsy to fold in multiple places.

I am happy with the way I created this piece, a few lessons in welding, or soldering, might not have gone a miss to aid in the construction of the monture frames, but as usual I faced the problem and found an alternative method!


Costings


Timings


Design Work Started: 8th Jan 2010


Design Work Completed: 11th Jan 2010


Design Work: 14hrs


Embroidered Item Started: February 2010


Embroidered Item Completed: Jan 2011


Embroidery Work: 29hrs


Authenticity of Work


Storage of Work, Materials, Tools and Equipment


Health and Safety


Monday 11 January 2010

Chapter Twelve

A Study of Three Artists


Chapter Eleven

Chapter 11

Make a Special Book, Portfolio

or any other simple structure related to Media,

Correspondance,or Stationery


My Proposal is to make a Fan.
Once fans where used as a communication devise between lovers.


A language of fans was created so messages could be sent without chaparones, Fathers and even Husbands finding out!
Front View of the Completed Fan

The attached book is to symbolise a dance card, but instead holds the messages trapped inside the grids of each monture and the instructions of how to hold the fan to convey the message.

Rear View of the Completed Fan

The montures are held together with a clear acrylic thread.

This allows the fan to be opened to just the correct distance and to hold the shape.

How the Fan was Made...

Initial Sketch and ideas for messages


I intend to create grids and use the papermaking techniques to "trap" the messages in the fan.


I have chosen six messages

1 . We Will be Friends

2. When Can I see You?
3. I Promise to Marry you
4. You May Kiss Me!
5. I am Sorry

6. I Wish to Speak to You!


A technical drawing to actual size of proposed fan


How I will "trap" the messages:

Example of a mixture of typefaces


Grids are created by drawing lines that follow the contour of the letter


The Grid once the text has been removed


A simple frame


Frame laid over the grid and guide line threads are sewn catching the inside edge of the frame each time, once the guidelines have been sewn blanket stitch over them to strengthen.


Overview of what I did


The completed thread grid follows closely the pencil lines

The style of fan I intended to use was a Brise fan - made entirely of sticks which broaden towards the top and are held together with ribbon, but after seeing the Jenny Lind Fan - a brise fan made with fabric cut like feathers or petals mounted on sticks, I decided to go with this style


Here is a example of a Jenny Lind Brise fan made with paper moons


I looked into how my design would look as a Jenny Lind brise fan


and how many Montures - or arms of the fan that give it structure would be required.


I settled on eight, a front and back and six message montures


Once I had discovered that there was a Fan Museum in Greenwich I just had to go!


It was full of delightful examples covering the full history of it's developement


and how there are made.


Trapping the Message


I will show you how one of the messages was captured,

I used the same technique with each message

Message Four... You May Kiss Me!


The message's text is brought closer together

so that the details within the grid will be inside the framework


Tracing Paper is laid over the text and the prominent lies are drawn in


Using a light book I traced the lined grid on to dissolveable paper


I machined over the lines with a straight stitch.


Message 4 with first machine stitching


Some of the other messages


Then returned over the straight stitch with a zig zag


The message captured!

To make sure the grid kept it's shape it was sewn onto a piece of brown envelope

and the soluable paper was washed away


Once the paper had washed away and the threads had dried

hand stitched embellishments were added

Message 1

Message 2

Message 3

Message 4

Message 5

Message 6

The Frames were then made

and the front and rear montures were given their grids

The grids were attached to the frames


Message 4 on it's frame


The completed messages on their frames


Adding the Pulp


Drying the pulp


The Messages with Stitch and Paper embellishment


I was advised that the edges were not really thought through.

I initially thought that the organic nature of the paper pulp was captured in them

But they were unstable and wouldn't have lasted long.
So I removed the rough edges and spent some time thinking about
the machanics of joining them together.


With a neater edge
The wire was bent to a circular shape and glued to a washer
The sticks were whipped with a yellow wire.
Although the edges were neater they needed something more...

Beading prehaps?
I had collected together a fine selection of threads for this project so I gathered them together and made them into a whipped thread.


Then I joined two lengths of the new thread together to produce a flat broad ribbon


This was then attached to the frame.

Going around twice!


I threaded a selection of blue, brown and yellow beads of varying sizes onto a strong thread


and crouched this beaded thread onto the new edging


Close up


What to do with the washers?
And how will it be joined together?


The Front and back montures will need to have something creative covering the washers and I used the old school hand writing charts and the following handwriting it produced to design this simple roundal.

The felt discs will be sewn together and a repeat of the beads from the above edging will complete it.

The other washers will be hidden from view so they have been painted brown and a felt filler "washer" has been glued to them to aid movement once attached.

Message 4 with it's new edging and felt washer
I have since decided that the felt washer and painted metal were some what crude and changed them to having a complete cover similar to the front and rear montures
A clear acrylic thread has been sewn through each monture, the same length each time, so that as it openes it keeps the same shape and distance between each monture.